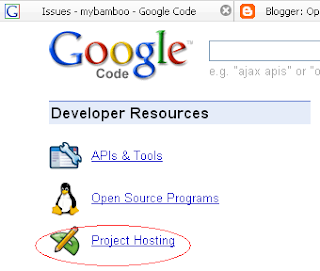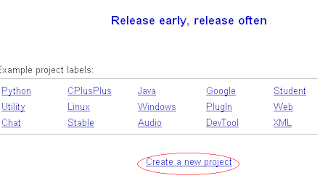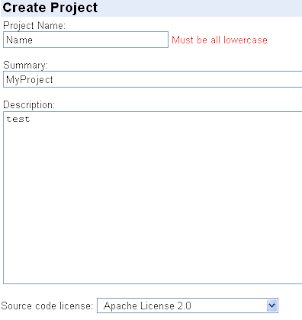
2# เข้าหน้าแรกเพื่อทำการสมัคร
http://code.google.com
http://code.google.com/hosting/


| |
Starting and stopping Tomcat 4.x, 5.x and 6.x
Registering Tomcat process to Eclipse debugger
Creating a WAR project (wizard can update server.xml file)
Adding Java Projects to Tomcat classpath
Setting Tomcat JVM parameters, classpath and bootclasspath
Exporting a Tomcat project to a WAR File
Capability to use a custom Tomcat classloader to load classes in several java projects at the same classloader level than classes in a Tomcat project, see readmeDevLoader.html (Thanks Martin Kahr)
Contact plugintomcat@eclipsetotale.com
This plugin is free and open-source
| Version | File | Date | Comment |
|---|---|---|---|
| 3.2.1 | 10 May 2007 | Works with Eclipse 3.1, 3.2 and 3.3M7 | |
| 3.2 | 13 April 2007 | Works with Eclipse 3.1, 3.2 and 3.3M6 | |
| 3.2 beta3 | 20 November 2006 | Works with Eclipse 3.2 and Eclipse 3.1 | |
| 3.2 beta2 | 25 October 2006 | Works with Eclipse 3.2 and Eclipse 3.1 | |
| 3.1 | 15 September 2005 | Works with Eclipse 3.0 and Eclipse 3.1 (fix a problem with Eclipse 3.1M6) | |
| 3.0 | 27 July 2004 | Works with Eclipse 3.0 and Eclipse 2.1 | |
| 2.2.1 | 1er August 2003 | Works with Eclipse 2.1 and Eclipse 3.0 M2 |
Tomcat 4.x patch for JSP debugging (Thanks to Johan Compagner)
| Tomcat Version | File | Date |
|---|---|---|
| 4.1.24 | 1 April 2003 |
To install this patch, unzip the file in <%TOMCAT_HOME%>/classes for tomcat 4.0x, or in <%TOMCAT_HOME%>/common/classes for Tomcat 4.1.x
This plugin does not contain Tomcat.
(Download and install Tomcat before using this plugin).
This is a design choice not to include Tomcat in the plugin distribution, this way the same plugin version can works with any Tomcat version.
Download tomcatPluginVxxx.zip
Unzip it in your_Eclipse_Home/plugins
Plugin activation for Eclipse 3.x :
- launch eclipse once using this option : -clean
- if Tomcat icons are not shown in toolbar : select menu 'Window>Customize Perspective...>Commands', and check 'Tomcat' in 'Available command groups'
Set Tomcat version and Tomcat home : Workbench -> Preferences, select Tomcat and set Tomcat version and Tomcat home (Tomcat version and Tomcat home are the only required fields, other settings are there for advanced configuration).
This plugin launches Tomcat using the default JRE checked in Eclipe preferences window.
To set a JDK as default JRE for Eclipse open the preference window : Window -> Preferences -> Java -> Installed JREs.
This JRE must be a JDK (This is a Tomcat prerequisite).
The plugin sets itself Tomcat classpath and bootclasspath. Use Preferences -> Tomcat ->JVM Settings, only if you need specific settings.
Official documation (french) : http://www.eclipsetotale.com/articles/tomcat/tomcatPluginDocFR.html
Tutorials (english) :
In some case, despite it is correctly unzipped in Eclipse 3 'plugins' directory, the plugin is not loaded : run Eclipse with the -clean option to solve the problem.
ClassNotFound when using DevLoader and launching Tomcat 5.5.12 and above
Workaround : set context definition mode (Preferences->Tomcat) to 'Context files'.
Explanations :
This problem is due to a change in Tomcat 5.5.12 and above (see http://issues.apache.org/bugzilla/show_bug.cgi?id=37302 ,
We hope this bug will be fix but it seems that Tomcat developers don't care about it because it happens when a context containing its own loader is defined in server.xml file and since Tomcat 5 defining context in server.xml is not recommended)
ClassNotFoundException on javac/Main when accessing JSP : Tomcat is started with a JRE instead of a JDK.
If you have a problem with the plugin check eclipse log file (<%Your_Workspace_dir%>/.metadata/.log)
If you have any problem with this plugin send an email to plugintomcat@eclipsetotale.com .
Are you not satisfied with the zip bundle thats generated out of your module suite from Netbeans? Are you looking for an easy way of generating installers for suite projects right inside the Netbeans IDE?
Well, here it is..a plugin based on openInstaller installer framework that does just this. openInstaller is an extendable, cross-platform, multi-home install and customizable installer framework. All you have to do after installing the plugin is :
Download the plugin from this update center. (you need to manually configure this update center in your Netbeans IDE. If you do not know how to do this, go here. Look into the first part and use this update center link.
More information (in the form of FAQ) about the plugin is here.
You really have to see this flash demo which shows how easy is to generate an installer for your module suite application.
Disclaimer: The module described here are purely experimental (alpha version), so no guaranties. Use at your own risk.
Below are the screenshots of the plug-in actions..
The screenshots show the process of generating installers for the FeedReader suite sample that comes with Netbeans IDE
http://blogs.sun.com/vdblog/entry/netbeans_module_suite_installer_generator
void cancelAll(Collection c) {
for (Iterator i = c.iterator(); i.hasNext(); ){
TimerTask task = (TimerTask)i.next();
task.cancel();
}
}
void cancelAll(Collectionc) {
for (TimerTask task : c)
task.cancel();
}